
Formatters are a really helpful feature when working with Forms in ServiceNow. Instead of being limited to the out-of-box types of form fields like String, Integer, and Date/Time, you can create your own way of displaying information to users, and add that so it appears on the form.
You can find the full list of formatters on your instance by visiting the sys_ui_formatter table. The most common ones you’ll have seen are the Activity Stream, Process Flow formatter, and Variables formatter.
Formatters are most well known for their use in the Core UI, however each formatter allows you to define how it appears not only in the Core UI, but also in Service Portal and in the Next Experience Form component.
In this article, I’ll guide you through how to setup a very simple custom component and place it on a form using a formatter, with it reacting to changes that happen to the form.
The Formatter
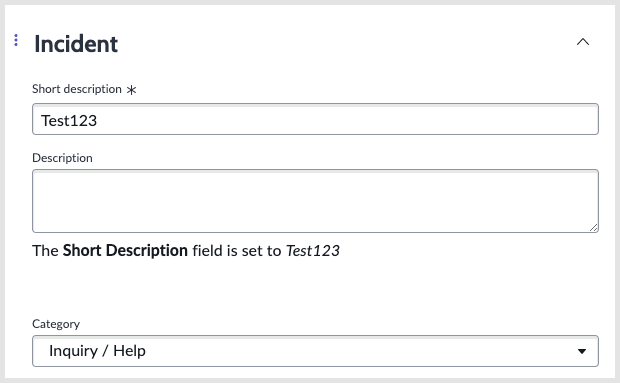
The formatter we will be creating is a simple one on the Incident form, which reacts to changes in the Short Description field and updates its content based on what the field is set to. For example as we update the Short Description field to “Test123” the text inside the component updates to say “The Short Description field is set to Test123”.
Create and Deploy the Project
After creating the project using the Next Experience CLI and installing dependencies, you’ll have a single component in your project’s src folder.
Opening the index.js file inside that component, and update the call to the createCustomElement function, passing in a properties parameter as shown below:
createCustomElement('YOURCOMPONENTNAME', {
	renderer: {type: snabbdom},
	properties: {
		table: {
			default: ""
		},
		sysId: {
			default: ""
		},
		fields: {
			default: ""
		},
		sections: {
			default: ""
		},
		relatedLists: {
			default: ""
		},
		isNewRecord: {
			default: ""
		},
		isReadOnly: {
			default: ""
		},
		view: {
			default: ""
		},
		componentId: {
			default: ""
		}
	},
	view,
	styles
});
All these properties like table, fields, isNewRecord etc are passed into your formatter component automatically by the Form component.
Using the values supplied through these parameters, we can update the view constant as follows to alter how the component displays depending on the value of the short_description field:
const view = (state, {updateState}) => {

	const properties = state.properties;

	if (properties.fields.short_description.displayValue !== '') {
		return (
			<div>The <b>Short Description</b> field is set to <em>{properties.fields.short_description.displayValue}</em></div>
		);
	} else {
		return (
			<div>The <b>Short Description</b> field does not have a value.</div>
		);
	}
};
The final thing we need to do before deploying the component to the instance is update the component definition in now-ui.json in the root of your component project. In particular we need to update the label of the component’s uiBuilder property so that we can easily select it on the instance.
{
    "associatedTypes": ["global.core", "global.landing-page"],
    "label": "YOUR_LABEL_HERE",
    "icon": "document-outline",
    "description": "YOUR_DESCRIPTION_HERE",
    "category": "primitives"
}
Once updated, you can use snc ui-component deploy command to deploy it to your instance.
Create and Use the Formatter
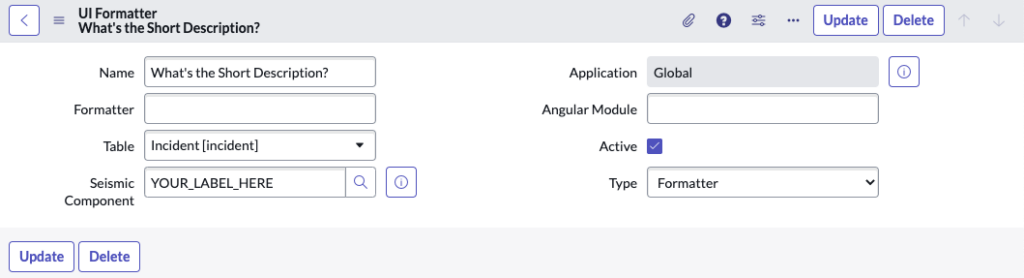
With the component now on our instance, create a new record in the sys_ui_formatter table. You’ll need to give it a name. For the table you can set it to either an actual table like Incident [incident], or Global for it to apply to every table on the instance.
Set the Seismic Component field to your component you created. It will appear as whatever you set its label to in the previous step.
Set type to Formatter, and active to True.
If you want the formatter to also appear in the Core UI and Service Portal, you can set the Formatter to a UI Macro and Angular Module fields to an AngularJS module name as appropriate. Creating these is outside the scope of this article.
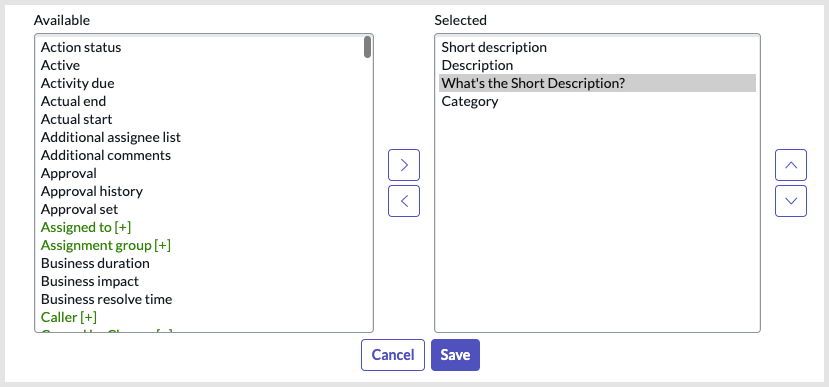
With the formatter now created, we can go into the incident table and create a new form view. You’ll see your formatter in the list of available items to add to the form.
Test the Results
Now, with our view created, we can use the Form component to show the incident form, and supplying that view name we can see our formatter is showing within the form!
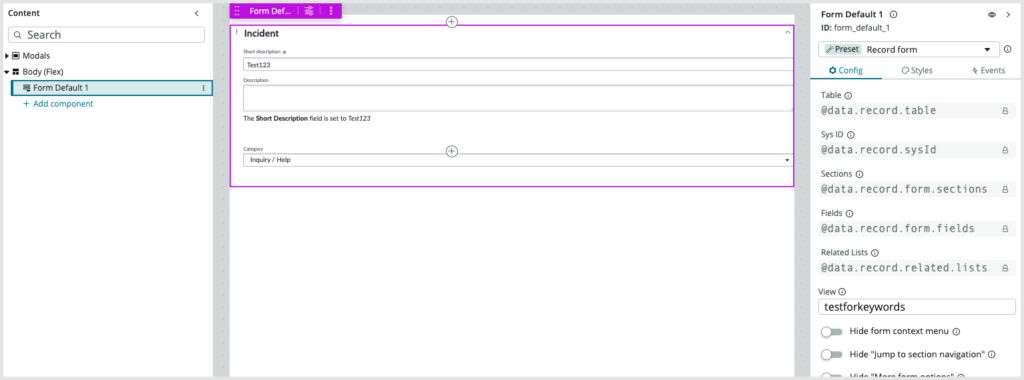
Opening the actual page, as you can see when we update the short description and click outside the field, the fields property of the component is automatically updating, which triggers our component to re-render, and the change to the short description is reflected in the component too.